
When you host a server with FPS.ms we allow you to upload any file(s) into it either using the server panel or if you wish to transfer larger files, by using SFTP.
Info
By default your server will only have 5GB of storage. This is enough for most servers, but if you wish to upgrade this, you can do so with our Pro plans.
Uploading Files through the Server Panel
- Open your browser and go to https://panel.fps.ms.
- Select your server and go to the Files tab.
- Click Upload.
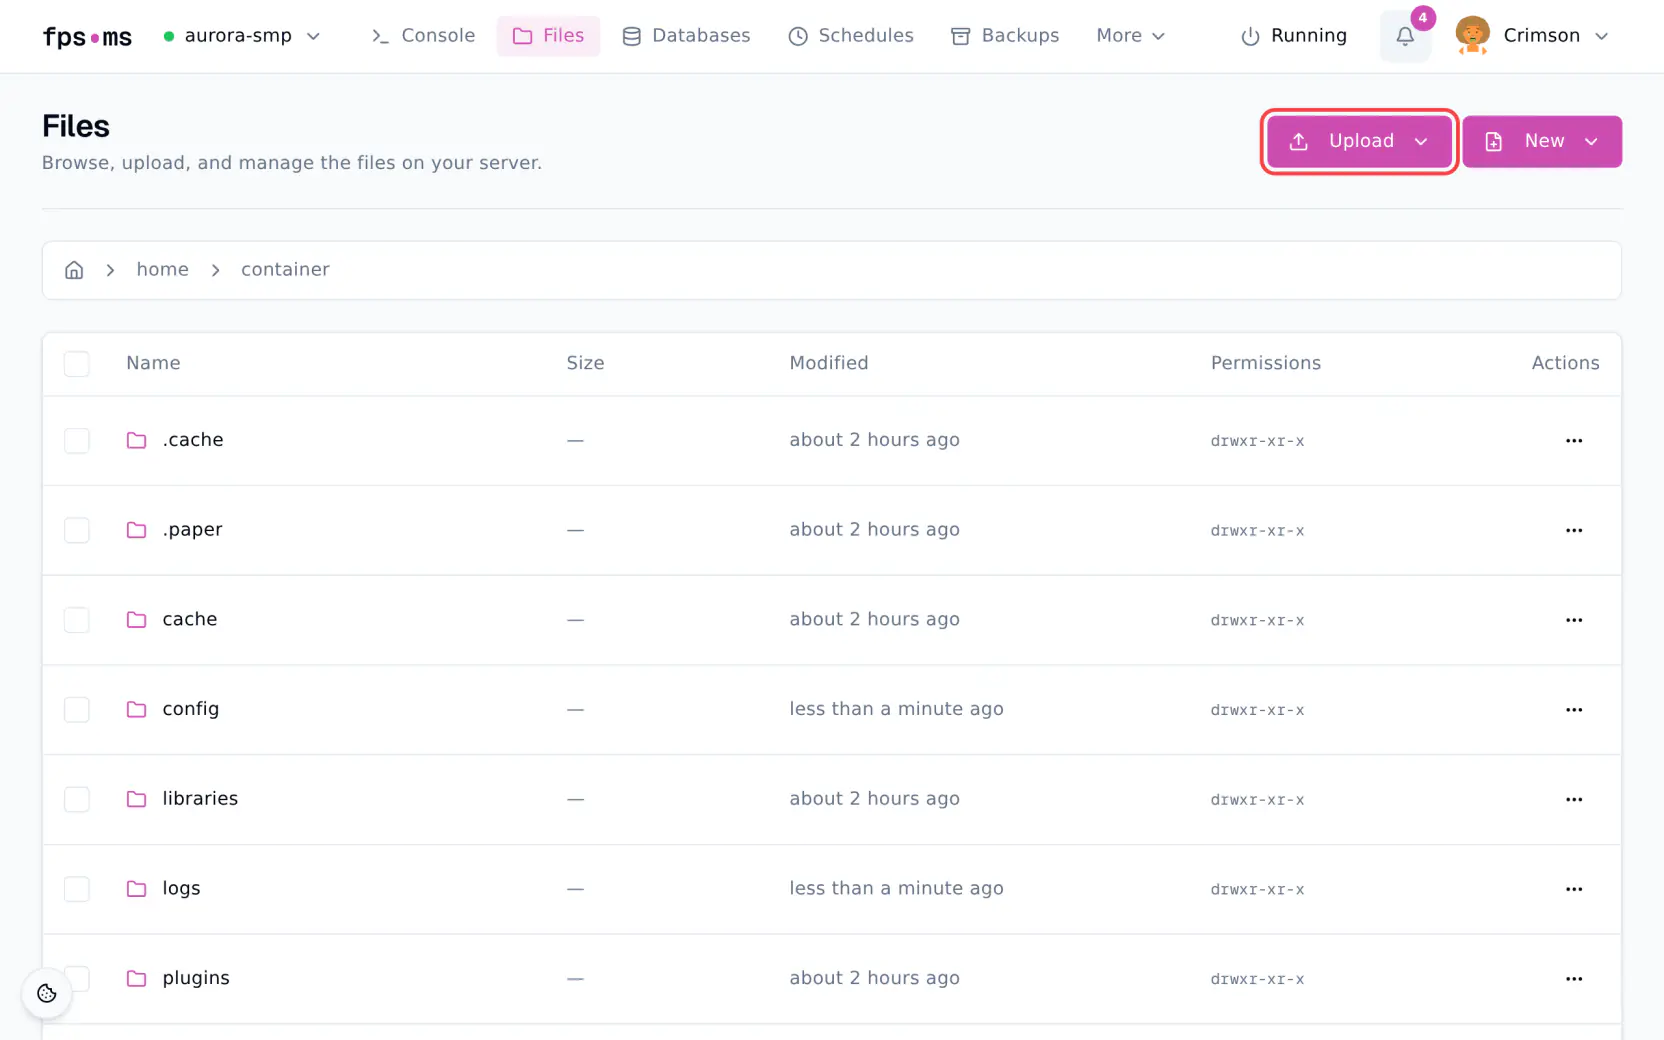
- Click Upload files, choose the file(s) you want to upload and click Open.
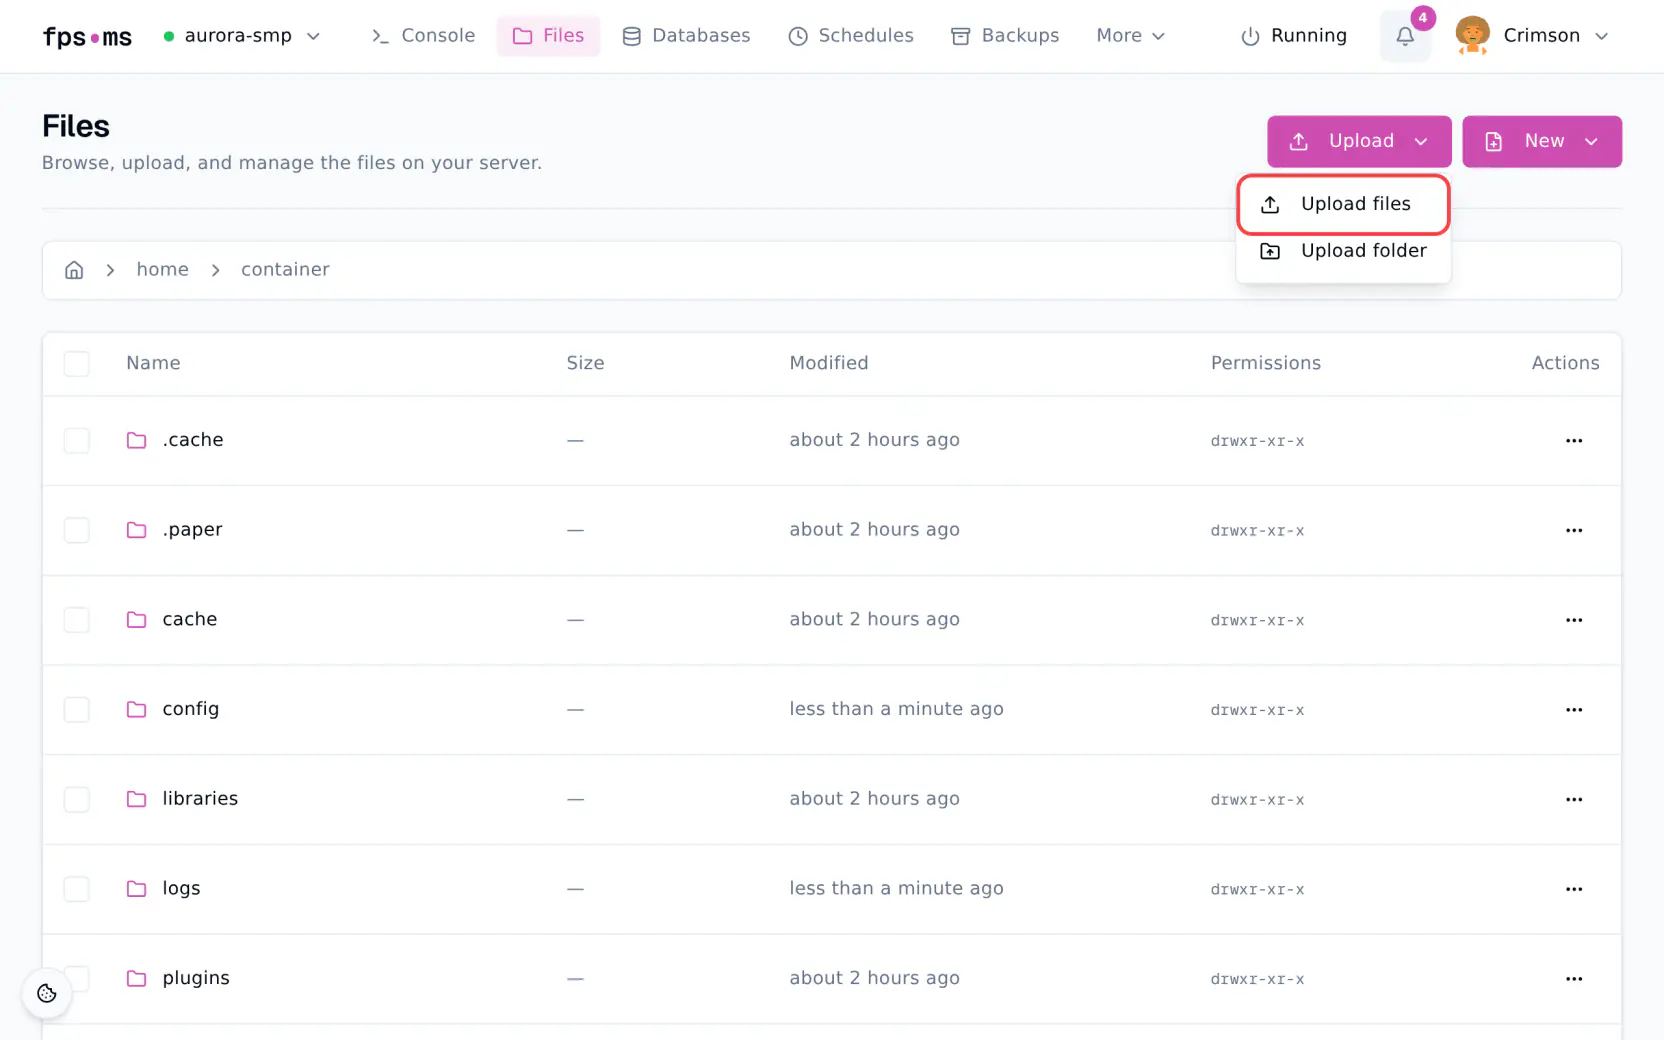
- The file(s) start uploading right away. When the upload is done, you can find them in the folder you have open.
Maximum filesize
There is a 100MB upload size limit when uploading files through the Server Panel! Please use an SFTP connection to transfer larger files.
Uploading Files Through FileZilla
- Connect to your server through SFTP using the guide found in our knowledgebase.
- Drag and drop the files you want to upload on an empty spot in the Directory Viewer of the Remote Site section found at the Bottom Right side of the window.
- Upload should automatically start and you should see a progress bar at the bottom of the screen. Once it is done uploading you should see the file in the Directory Viewer.
Your FileZilla settings should look a bit like this:
